This post has been sitting around for quite a while. I originally planned on doing a “how to build a custom closet organizer” instructional post, but when I was building I forgot to take a bunch of pictures. The pictures I did take sat around for a long time in a draft so I also lost the motivation to do it properly. Here are the remnants of what I wanted to say.
Every first time parent goes through the nesting process. In modern day America, we get a room ready for the baby – namely the nursery. I did a complete room remodel before the baby was born, but never really finished. I stripped the room, refinished the floor, refinished the walls, put in new baseboards, painted, installed new blinds and a new ceiling fan. I got all the furniture set up, but I never got the doors back in and never completed the closet.
For a few months, we used the empty closet to stuff away boxes and clothes that our daughter grew out of. I got sick of the mess in the room and the space that the wood was taking up in the garage, so I finally made some time to build a closet organizer. I thought about purchasing one, as I have in the past, but closet organizers carry a huge markup, and I thought I could do a better job on my own.
First, I measured out the space and planned out on paper what I wanted to do. Conceptually, I wanted to have the left side of the closet for long hanging clothes, and the right side to have a double set for shirts and pants. I already had all the necessary supplies like wood, poles, supports, and paint, so I went straight to work.
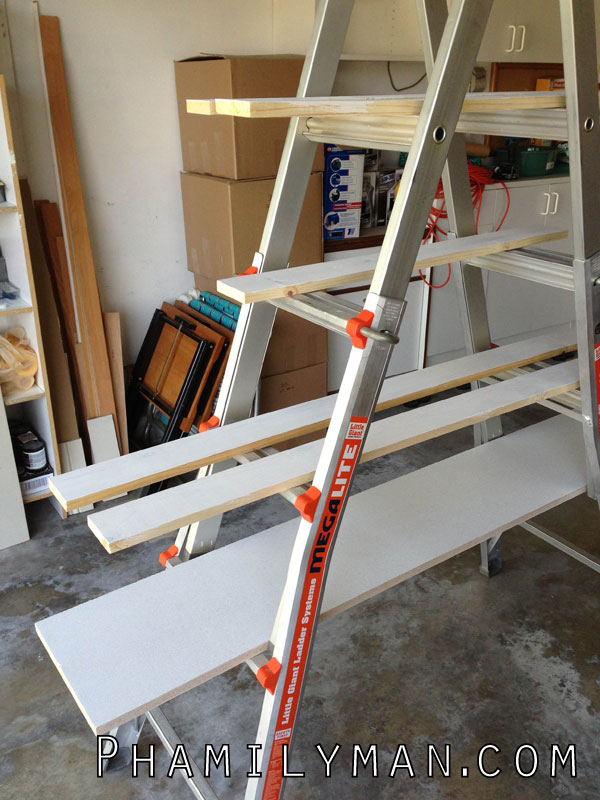
I double checked the measurements to my plan and cut the wood accordingly. I sanded them down, primed, and then painted them. I only have one set of sawhorses, so I used the ladder to lay out and dry the rest of the of painted wood. The smaller beams in the picture are for the supports. The larger piece of wood became a shelf.
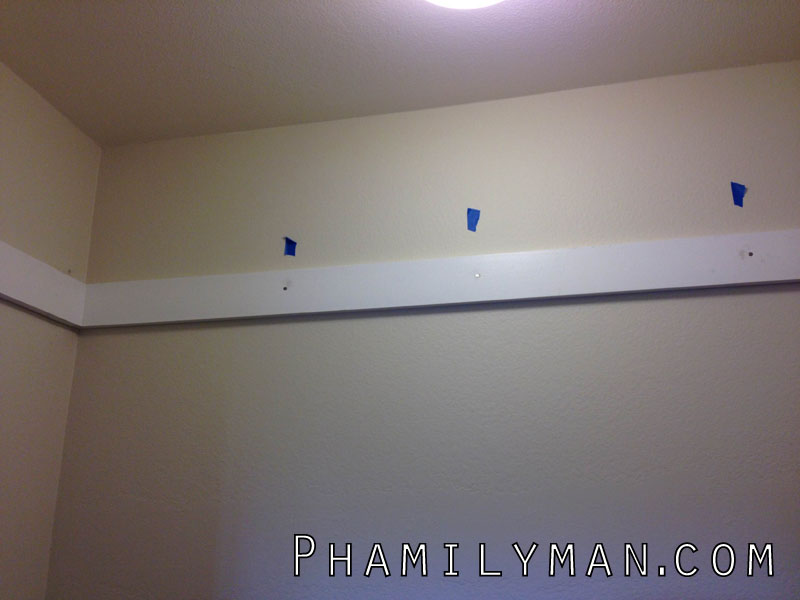
This is the top brace set in. The top brace spans from the left, center, to right side. I used blue painters tape to mark the studs so I would know where to put the nails. I used nails instead of screws because it would be easier to pry the entire brace out if I ever needed to change the configuration. Another consideration from using screws vs. nails is when it gets painted over. Painted over screws are a pain in the butt to get out in the future, especially if they have several coats of different paint on them.
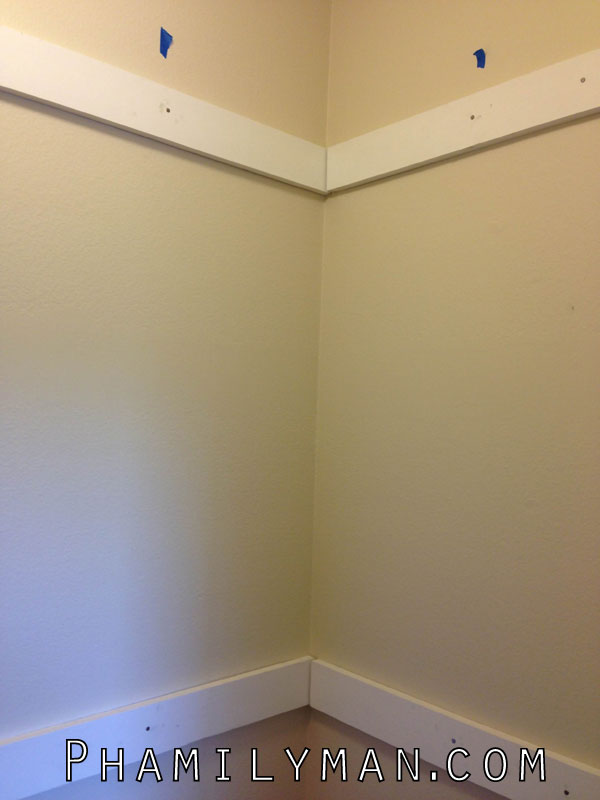
This is the right side of the closet with the top and bottom brace set in. The bottom brace only goes about 2/3 of the way on the main wall for the 2nd tier, and the spans over to the right side only.
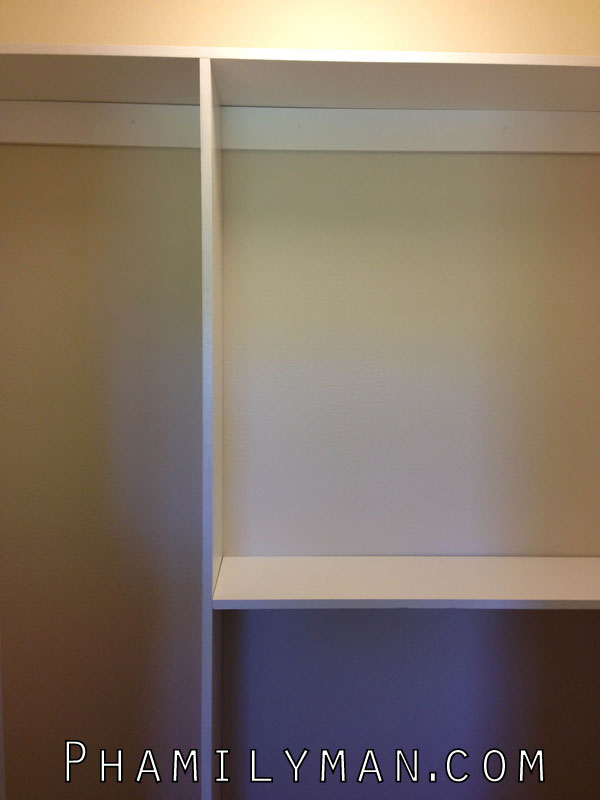
The main support and shelving gets set in. They eventually get secured by some L shaped brackets and screws. Now you can picture where the left side will get a pole for long hanging clothes and the right side will get two sets of closet poles.
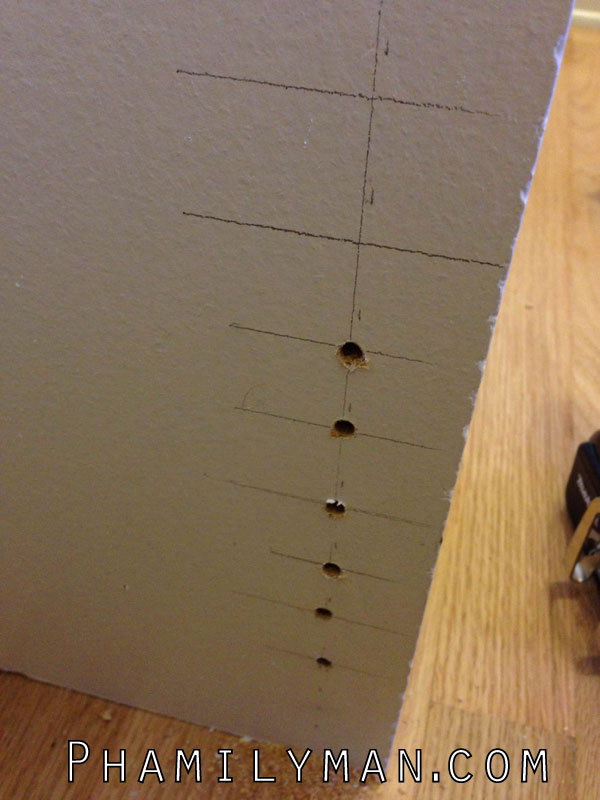
Closet organizers you purchase from the big box stores will often have adjustable shelves that are really handy. Here is a poor man’s way of making those holes for adjustable shelves. I basically made vertical marks with a ruler on both ends of the piece of wood. Then I used a level to make a cross mark where I was planning on drilling. I taped a max-depth mark on my drill bit so I wouldn’t drill completely through the wood where I was making the holes.
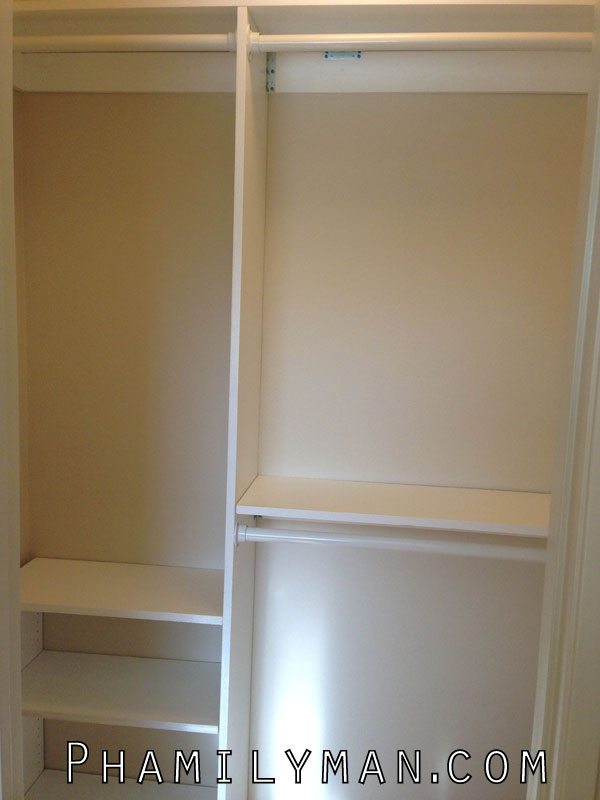
Here is the completed project. A custom closet organizer built on the cheap. My daughter gets a top shelf, a closet pole on the left for dresses, two closet poles on the right for shirts and pants, and a two adjustable shelves for shoes or miscellaneous items.
Talk to me, Goose.